
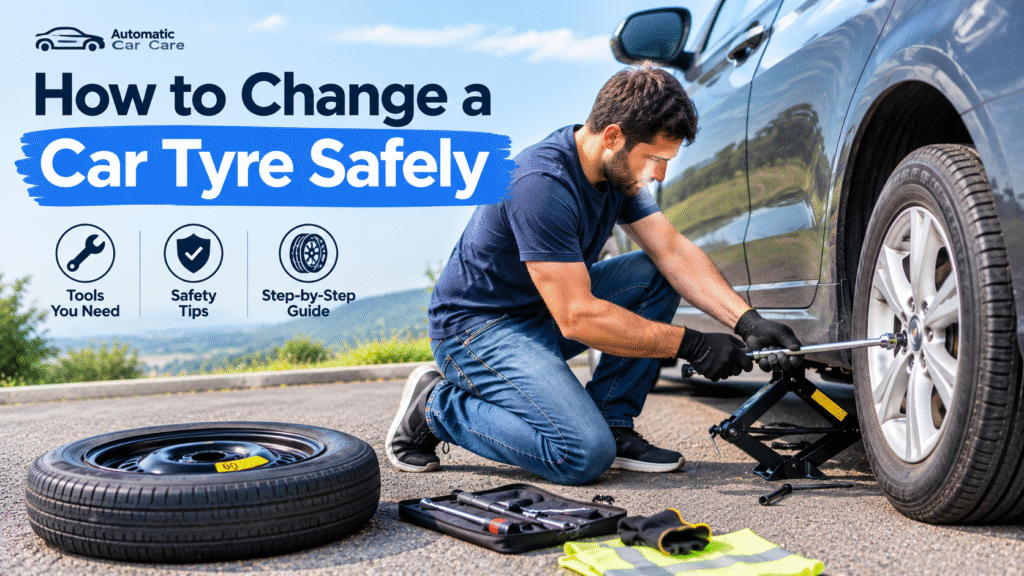
A flat tyre can happen when you least expect it. You might notice a warning light on your dashboard, feel the car pulling to one side, or hear an unusual thumping sound while driving. Knowing how to change a car tyre can help you deal with the situation calmly and avoid waiting for roadside assistance when a safe tyre change is possible.
The process involves parking in a safe place, loosening the wheel nuts, lifting the vehicle with the correct jack, and fitting a spare tyre. However, safety must come first. Changing a tyre on a busy road, soft ground, or an unstable surface can put you at serious risk.
This guide explains how to change a car tyre step by step, which tools you need, and what to check before driving again.
What Tools Do You Need to Change a Car Tyre?
Before starting, check whether your vehicle has a spare tyre and the necessary tools. Many modern cars come with a tyre repair kit instead of a full-size spare.
Here is what you may need:
- Spare tyre: A properly inflated spare that fits your vehicle.
- Car jack: A jack rated for your vehicle’s weight.
- Lug wrench: A tool for loosening and tightening wheel nuts.
- Wheel chocks: Blocks that help prevent the car from rolling.
- Owner’s manual: Instructions for the correct jacking points and wheel-changing procedure.
- Gloves and a reflective vest: Useful for protecting your hands and improving visibility.
- Wheel-lock key: Required if your wheels have locking nuts.
- Torch: Helpful if you have to work in low-light conditions.
Keep these items together in your car if the manufacturer supplies them. Check the spare tyre’s pressure periodically because a spare that has been sitting unused may not be ready for an emergency.
How to Change a Car Tyre in 10 Steps
Step 1. Find a Safe Place to Stop
If you notice a flat tyre while driving, reduce your speed gradually. Avoid sudden braking or sharp steering, and move away from traffic if you can do so safely.
Choose firm, level ground well away from moving vehicles. Switch on your hazard lights and apply the parking brake.
If you are on a motorway, a narrow shoulder, a bridge, or another dangerous location, do not attempt to change the tyre beside moving traffic. Get yourself and your passengers to a safe place if possible, then contact roadside assistance.
Your safety matters more than replacing the tyre immediately.
Step 2. Secure the Car
Put an automatic transmission in Park (P). For a manual transmission, select first gear or reverse, following your vehicle’s instructions.
Apply the parking brake firmly. Use wheel chocks if available, placing them appropriately to prevent the car from rolling.
Ask passengers to leave the vehicle and wait in a safe location away from traffic. Never work underneath a car supported only by a jack.
Step 3. Prepare the Spare Tyre and Tools
Take the spare tyre, jack, and lug wrench out of the boot or designated storage compartment. Check that the spare appears undamaged and has sufficient pressure.
Read your owner’s manual to locate the approved jacking points. Using the wrong point can damage the vehicle or cause the jack to slip.
If the car has wheel covers, remove them according to the manufacturer’s instructions. Locate the wheel nuts and check whether a locking-nut key is needed.
Step 4. Loosen the Wheel Nuts
With the vehicle still resting on the ground, fit the lug wrench onto each wheel nut and turn it counterclockwise to loosen it.
You may need firm pressure, but keep your balance and avoid sudden movements. Loosen each nut slightly rather than removing it completely.
If a nut will not move, do not jump on the wrench or use an unstable extension. Seek professional assistance if it cannot be loosened safely.
Step 5. Lift the Car With the Jack
Position the jack at the manufacturer’s recommended lifting point. Make sure it sits on firm, level ground and is correctly aligned.
Raise the vehicle slowly until the flat tyre is just clear of the ground. Stop immediately if the jack tilts, shifts, sinks, or makes the car unstable.
Never place your hands, legs, or any part of your body beneath the vehicle while it is supported by the jack. If the car becomes unstable, move away rather than trying to catch or steady it.
Step 6. Remove the Flat Tyre
Once the tyre is off the ground, remove the loosened wheel nuts and keep them somewhere they will not roll away.
Hold the tyre securely and pull it straight toward you. A wheel can be heavier than it looks, so lift with care.
If the wheel is stuck to the hub because of corrosion, avoid striking it in a way that could damage the vehicle or destabilize the jack. Get professional help if it will not come off safely.
Place the flat tyre flat on the ground, away from traffic.
Step 7. Fit the Spare Tyre
Line up the holes in the spare wheel with the wheel studs. Lift the wheel into place and push it onto the hub.
Install the wheel nuts by hand first. Turn each nut clockwise and make sure it engages correctly without cross-threading.
Tighten the nuts lightly in a crisscross or star pattern so the wheel sits evenly against the hub. Do not fully tighten the nuts while the car is raised.
If the spare does not fit properly, stop. Never force a wheel onto the hub or use wheel nuts that are incompatible with it.
Step 8. Lower the Car and Tighten the Nuts
Lower the vehicle slowly until the spare tyre touches the ground and the wheel can no longer rotate freely. Follow your owner’s manual for the correct lowering procedure.
Use the lug wrench to tighten the wheel nuts in a crisscross pattern. Ideally, use a torque wrench to tighten them to the vehicle manufacturer’s specified torque.
Avoid guessing the torque value because it varies by vehicle and wheel type. Incorrect tightening can cause wheel damage or create a safety hazard.
Once the wheel is secure, lower the car fully and remove the jack. Store the tools and flat tyre safely.
Step 9. Check the Spare Tyre
Before driving, inspect the fitted wheel and check the spare tyre’s pressure if you have a gauge or pressure monitoring system.
If the spare is a temporary or space-saver tyre, read the label on the tyre and the instructions in your owner’s manual. Temporary spares often have a lower maximum speed and a limited driving distance.
Do not assume every spare tyre is suitable for normal driving. Some vehicles use directional wheels, different wheel sizes, or special tyre arrangements that require additional precautions.
If you notice loose wheel nuts, severe vibration, a warning light, or an incorrectly seated wheel, do not continue driving until the problem has been resolved.
Step 10. Drive Carefully and Arrange a Repair
After changing the tyre, drive cautiously and follow the spare tyre’s speed and distance restrictions. Avoid hard acceleration, sudden braking, and sharp cornering.
Check the wheel nuts again as directed by your vehicle manufacturer. Some manufacturers recommend a follow-up torque check after a short distance.
Arrange to repair or replace the damaged tyre as soon as possible. If the tyre has a sidewall cut, a large puncture, or structural damage, it may not be repairable.
A temporary spare is intended to get you to a suitable repair facility, not to replace a normal tyre permanently.
Common Mistakes to Avoid When Changing a Car Tyre
Even a straightforward tyre change can become dangerous if you rush. Avoid these common mistakes:
- Changing a tyre too close to traffic: Move to a safe location or contact roadside assistance.
- Using the wrong jack point: Incorrect positioning can damage the car or cause it to fall.
- Working on soft or sloping ground: The jack may sink or slip.
- Removing wheel nuts before loosening them on the ground: The wheel may spin, making the nuts harder to loosen.
- Crawling underneath a jacked-up car: A standard car jack is not a safe support for working beneath a vehicle.
- Overtightening or undertightening wheel nuts: Use the specified torque where possible.
- Ignoring spare tyre limits: Temporary spares may have strict speed and distance restrictions.
Taking an extra moment to check your equipment and the vehicle’s instructions can prevent avoidable problems.
Can You Change a Car Tyre Without a Jack?
In most situations, removing a conventional car wheel safely requires suitable lifting equipment. Trying to lift the vehicle manually or using bricks, loose wood, or improvised supports can be extremely dangerous.
If your jack is missing, damaged, or unsuitable for the vehicle, call roadside assistance or a qualified tyre service. A tyre repair kit may be an alternative for certain punctures, but only if the vehicle manufacturer permits its use and the damage is suitable for repair.
How Long Does It Take to Change a Car Tyre?
For someone familiar with the process, changing a tyre in a safe location may take around 15 to 30 minutes. A first-time driver may need longer, especially if the wheel nuts are tight or the spare tyre is difficult to access.
Weather, traffic conditions, the vehicle’s design, and the type of wheel can all affect the time required. Never rush a tyre change to meet a time estimate.
How Often Should You Check Your Car Tyres?
Check tyre pressure regularly, ideally when the tyres are cold, and follow the pressure figures in your owner’s manual or the vehicle’s tyre information label.
Inspect the tread and sidewalls for cuts, bulges, uneven wear, and embedded objects. Check the spare tyre too, if your car has one.
If the steering wheel vibrates, the vehicle pulls to one side, or a tyre repeatedly loses pressure, arrange an inspection. These symptoms can indicate a puncture, alignment problem, wheel imbalance, or another issue that needs attention.
For more practical maintenance advice, visit Automatic Car Care.
Frequently Asked Questions
Which way do you turn wheel nuts to loosen them?
On most cars, standard wheel nuts loosen by turning counterclockwise and tighten by turning clockwise. Check your vehicle’s instructions if you are unsure.
Can I change a tyre on the side of the road?
Only if the location is genuinely safe and the vehicle can be secured on firm, level ground away from moving traffic. Do not attempt a tyre change on a dangerous motorway shoulder or another exposed location.
Can I drive immediately after changing a tyre?
You can drive only after confirming that the wheel is properly fitted, the wheel nuts are tightened correctly, and the spare tyre is safe to use. Follow all temporary spare tyre restrictions.
What if my car does not have a spare tyre?
Some vehicles have a tyre repair kit, run-flat tyres, or roadside assistance arrangements instead. Check the owner’s manual to determine the correct response to a puncture.
Should I replace or repair a flat tyre?
It depends on the location and extent of the damage, the tyre’s condition, and the manufacturer’s repair guidance. Sidewall damage and severe structural damage commonly require replacement. Ask a qualified tyre professional to inspect it.
Do I need to retighten wheel nuts after changing a tyre?
Follow the vehicle manufacturer’s instructions. Some vehicles require a torque check after driving a short distance. Use the specified torque rather than estimating how tight the nuts should be.
Final Thoughts
Learning how to change a car tyre can make an unexpected flat less stressful, but the most important part of the process is staying safe. Choose a secure location, use the correct equipment, follow your vehicle manufacturer’s instructions, and make sure the spare tyre is suitable before driving.
If conditions are unsafe, the wheel will not come off, or you are uncertain about any step, contact a professional instead of taking unnecessary risks. Regular tyre inspections and pressure checks can also help you identify problems before they become roadside emergencies.